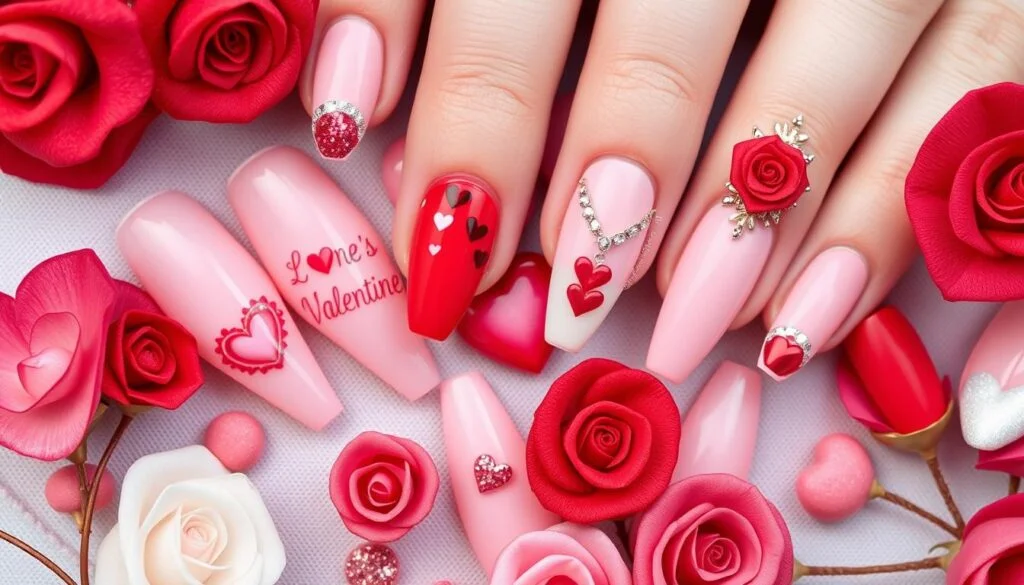

As Valentine’s Day gets closer, I think about making my nails look amazing. I love creating beautiful nail art designs. With a bit of practice and patience, you can make your nails look stunning too.
This year, I’m excited to share my top 10 DIY Valentine’s nail ideas with you. You’ll find everything from classic heart designs to modern twists. I’ll guide you through various DIY nail art techniques to create beautiful, romantic nail art.
Key Takeaways
- Discover 10 fabulous DIY Valentine’s nail ideas to make your hands look stunning
- Learn how to create beautiful and romantic nail art designs using DIY nail art techniques
- Get inspiration for classic heart designs and modern twists
- Find guidance on how to master the art of DIY nail art
- Explore various nail art designs and DIY nail art ideas to suit your style and skill level
- Learn how to make your nails look stunning with DIY nail art designs
Getting Ready for Your Valentine’s Nails Adventure
To make beautiful Valentine’s Day nails, you need the right tools. This includes nail polishes, a nail art brush, and a dotting tool. These tools help you create detailed designs that will make your nails pop.
Before starting, prepare your nails. Shape and buff them for a smooth finish. Pick nail polish colors that fit your Valentine’s theme. Red, pink, or purple shades are perfect for a romantic look.
Essential Tools and Materials
- Nail polishes in various colors
- Nail art brush
- Dotting tool
- Nail buffer
- Nail file
With the right tools, you can create amazing Valentine’s Day nails. Practice your skills before the big day. This way, you’ll get the best results.
Classic Heart Nail Design with a Modern Twist
To make a romantic nail art, start with a classic heart design. This timeless look can get a modern spin with bold colors and creative methods. Try a bright red heart on a neutral background or add glitter for sparkle.
Heart nail designs offer endless options. Use polish and a brush for detailed designs or add rhinestones for drama. Start with a tutorial or video to learn basic techniques.
Some romantic nail art ideas include:
- Pairing a heart with a subtle floral pattern
- Creating a bold, bright heart statement
- Adding whimsical, swirling patterns

Experiment with techniques and designs for a unique look. Whether you want elegant or playful, heart designs fit any style. With practice, you can make a beautiful, special nail art for Valentine’s Day or any occasion.
Essential Tips for Long-Lasting Valentine’s Nails Ideas
To make your Valentine’s Day nails last, use the right techniques and products. Pick nail polish colors for Valentine’s Day like classic reds and pinks, or soft pastels. These colors can mix to create beautiful, romantic designs.
A good base coat is key for long-lasting nail art. It protects your nails and makes polish go on smoothly. Try OPI or Essie base coats. Apply color in thin layers, letting each dry before adding more.
Color Application Techniques
- Use a nail polish brush with synthetic bristles for a smooth application
- Apply polish in the center of the nail and work your way out towards the tips
- Use a nail art brush to create intricate designs and patterns
Sealing Your Design
To seal your design and make it last, apply a top coat. This protects the polish and prevents chipping. Sally Hansen and Deborah Lippmann top coats are great choices.

Follow these tips for stunning, long-lasting nail art on Valentine’s Day. Choose the right nail polish colors for Valentine’s Day. Also, use a good base coat and top coat to keep your design looking fresh.
Sparkle and Shine: Glitter Gradient Hearts
To add sparkle to your Valentine’s Day look, try a glitter gradient heart design. Use glitter nail polish and a makeup sponge. This method creates a beautiful, ombre-like finish on your nails.
Here’s a step-by-step guide to get you started:
- Apply a base coat to protect your nails
- Paint a heart shape on your nail using a nail polish that matches your skin tone
- Dip a makeup sponge into glitter nail polish and dab it onto the heart shape, starting from the center and working your way outwards
- Seal your design with a top coat to add shine and protection
Some popular gradient nail art designs include:
- Soft pink to hot pink gradient
- Purple to silver glitter gradient
- Red to gold glitter gradient

Remember to have fun and experiment with different glitter nail polish colors and techniques. This way, you can create a unique gradient nail art design that’s all your own. With a little practice, you’ll be a pro at creating stunning, sparkly nails perfect for Valentine’s Day.
| Nail Polish Color | Glitter Effect |
|---|---|
| Pink | Soft, romantic sparkle |
| Purple | Rich, luxurious shine |
| Red | Bold, fiery glitter |
Minimalist Love-Inspired Patterns
Valentine’s Day nail art often means bold, bright designs. But for those who like it simple, minimalist nail art is perfect. It’s all about simplicity and elegance, great for everyday wear. We’ll show you how to make simple, elegant love-inspired patterns with nail polish and a brush.
To start with minimalist nail art, you need a few basic tools. These include a nail art brush, nail polish, and a base coat. Soft pinks and reds are classic Valentine’s Day colors. Minimalist nail art often uses negative space nail designs, leaving some nail areas bare for a clean look.

Popular minimalist nail art designs include simple lines, geometric shapes, and delicate hearts. These designs are easy to make and need little equipment. Here are some tips to get you started:
- Use a nail art brush to paint on simple lines and shapes
- Try different colors and patterns to find what you like
- Don’t be afraid to leave some nail areas bare for a negative space nail design
By following these tips and trying different techniques, you can make beautiful minimalist nail art designs for Valentine’s Day. Whether you want a subtle or bold look, minimalist nail art is a great choice.
| Design | Description |
|---|---|
| Simple Line Design | A classic and elegant design that involves painting on simple lines using a nail art brush |
| Geometric Shape | A modern and trendy design that involves creating geometric shapes using nail polish and a nail art brush |
| Delicate Heart | A sweet and romantic design that involves painting on a delicate heart shape using a nail art brush |
French Manicure with a Valentine’s Day Flair
To make a stunning French manicure for Valentine’s Day, follow my step-by-step guide. This classic style is ideal for the holiday. With a few tweaks, it becomes a lovely Valentine’s Day nail inspiration.
A traditional French manicure has a white tip and a neutral base. For Valentine’s Day, we can add a splash of color with red and pink polish. Red and pink shades are great for this holiday. You can create an ombre effect or add heart-shaped designs.
Here are some tips for a gorgeous French manicure with a Valentine’s Day twist:
- Use a nail guide or sticker for a clean line between the white tip and colored base.
- Choose a red or pink that matches your skin tone for the base.
- Add a heart-shaped design with a nail stamp or small brush.
With these easy steps, you can make a beautiful French manicure for Valentine’s Day. It’s perfect for a night out or a girls’ night in. So, get creative and show off your Valentine’s Day nail inspiration with a stunning French manicure.
Quick and Easy Valentine’s Nail Art for Beginners
Starting with simple nail art designs is key for beginners. I’ll show you some easy Valentine’s Day nail art ideas. These designs are quick to make and perfect for beginners.
The dotting tool is a great tool for nail art. It helps you make small designs like hearts or dots in red and pink. Even beginners can make cute designs with it.
Simple Techniques for Easy Nail Art
Using stickers and tape is another easy way to do nail art. You can make patterns or hearts with stickers. Or, use tape for straight lines or shapes. These methods are great for beginners because they’re easy to learn.
Easy Brush Techniques
If you like using a brush, there are easy techniques for Valentine’s Day nail art. Painting a thin line around your nail is one simple method. You can also make heart shapes or patterns with a brush. With practice, you can make beautiful designs.
Remember, the most important thing is to have fun. Try different techniques and designs until you find what you like. With these ideas, you can create stunning nail art for Valentine’s Day.
Advanced Valentine’s Day Nail Designs
I’m thrilled to share advanced Valentine’s Day nail designs with you. These designs will elevate your nail art to new heights. You can explore 3D nail art, nail guides, and embellishments like rhinestones or glitter.
To begin, you’ll need basic tools and materials. This includes nail polish, a nail art brush, and a steady hand. Here are some tips for creating beautiful nail art designs for Valentine’s Day:
- Use a nail art brush for detailed designs and patterns
- Try different nail polish colors and finishes, like glitter or holographic
- Add embellishments like rhinestones or stickers for extra flair
- 3D nail art: create raised designs with gel or acrylic
- Nail guides: use stickers or guides for straight lines and shapes
- Glitter ombre: blend glitter from one color to another for a striking look
With these techniques and practice, you can make stunning advanced nail art designs for Valentine’s Day. So, why not try and show off your skills with these beautiful nail art designs for Valentine’s Day?
| Nail Art Technique | Description |
|---|---|
| 3D Nail Art | Use gel or acrylic to create raised designs and patterns |
| Nail Guides | Use stickers or guides to create straight lines and shapes |
| Glitter Ombre | Gradient glitter from one color to another for a stunning effect |
Troubleshooting Common DIY Nail Art Mistakes
Even with the best techniques and products, nail art mistakes can still happen. I’ll share tips to prevent smudges, fix uneven applications, and salvage imperfect designs. These DIY nail art problems can be frustrating, but you can easily fix them.
Common nail art mistakes include smudges, uneven applications, and imperfect designs. To avoid these, use a base coat, apply thin polish layers, and seal with a top coat. If issues arise, you can fix them with a nail polish corrector or start over.
- Use a nail polish corrector to fix mistakes
- Start over if your design doesn’t turn out as planned
- Practice makes perfect – don’t be discouraged if your first attempts don’t turn out as expected
By following these tips, you can overcomenail art mistakes and get a beautiful, professional-looking design.
Color Combinations for Romantic Nail Art
Choosing the right nail polish color combinations is key for romantic nail art. We’ll look at many options, from classic red and pink to bold and bright, and soft pastels. The choices are endless.
Think about your skin tone and style when picking nail polish color combinations. Cool skin tones look good with blue or pink undertones. Warm skin tones do well with yellow or golden undertones. Here are some romantic nail color ideas to try:
- Pastel pink and white for a soft, feminine look
- Red and gold for a bold, luxurious look
- Soft peach and cream for a warm, romantic look
Remember, the fun in romantic nail art is trying new things. Don’t be shy to experiment with different nail polish color combinations. Keep trying until you find the perfect look for you.
By thinking about your skin tone, style, and the event, you can pick stunning romantic nail color ideas. Whether you want something classic or bold, the right nail polish color combinations can help you get there.
| Skin Tone | Recommended Colors |
|---|---|
| Cool | Blue-based pinks, purples, and reds |
| Warm | Yellow-based pinks, oranges, and corals |
| Neutral | Soft peaches, creams, and beiges |
Conclusion: Creating Your Perfect Valentine’s Day Look
As we wrap up our journey through Valentine’s Day nail art ideas, I urge you to let your style shine. You can go for a classic French manicure with a romantic twist or try glitter gradient hearts. The choices are limitless for DIY nail art.
The beauty of Valentine’s Day nails is making them your own. Try new techniques, mix colors, and show off your creativity. With some practice and the right tools, you’ll create a stunning look that will impress your loved one.
Now, it’s time to start! Collect your supplies, find a good time, and dive into DIY nail art. With these tips and ideas, you’ll make a special and unforgettable look for this special day.